How to Create a Branded QR Code
pbSmart™ Codes allows you to create robust QR code campaigns with customized mobile web pages. One of the other unique and powerful features of pbSmart Codes is the ability to create a “branded” QR code by adding an image or logo overlay onto the code itself.
This how-to article shows you just how easy it is to create a branded QR code that will stand out from the crowd and help customers identify it with your company. Note: This feature is available for pbSmart Code plans “Standard” and above. To learn more, visit the pbSmart Codes plans and pricing page.
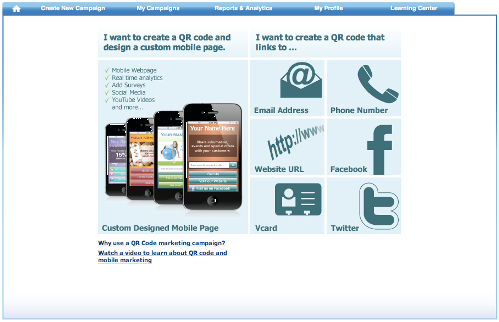
To get started, log in to pbSmart Codes and click the Create New Campaign tab. Initially you will be asked to choose what you want your QR code to link to: a custom mobile web page, an email address, phone number, etc. It doesn’t matter which option you choose. Any QR code can be branded with pbSmart Codes.
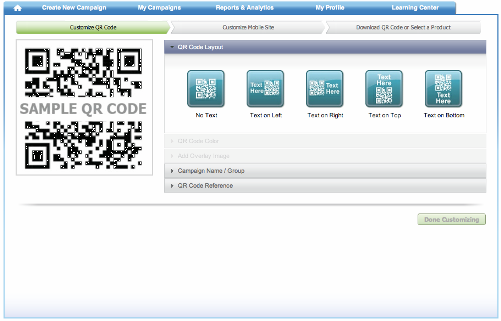
You will then be taken to the next step, “Customize QR Code”. Here, you can choose a color for your QR code, and add call-to-action text or a reference label.
Before adding an image overlay to your QR code, you must first select a text layout, either: No Text, Text on Left, Text on Right, Text on Top or Text on Bottom. 
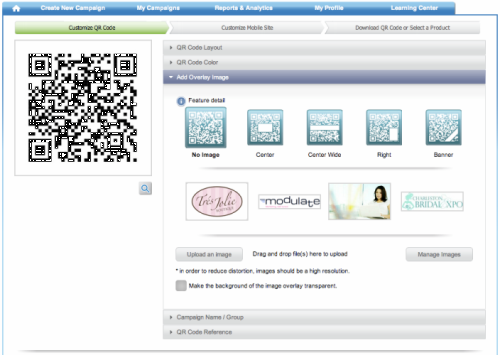
After making your choice, the horizontal bar labeled “Add Overlay Image” will be enabled – click anywhere within that bar to begin creating a branded QR code. First, choose where you would like your image to appear within the QR code, either: Center, Center Wide, Right, or Banner. The icons show exactly where your image will appear with each of these options.
After selecting the placement of your image or logo overlay, you have several ways to choose the image. You can: click one of the thumbnail images shown, click the Upload an Image button, or drag-and-drop an image file from a folder on your computer to the selection area. You could also choose an image from your pbSmart Codes Personal Image Library by clicking the Manage Images button. Be sure to choose a high-resolution image for best quality.
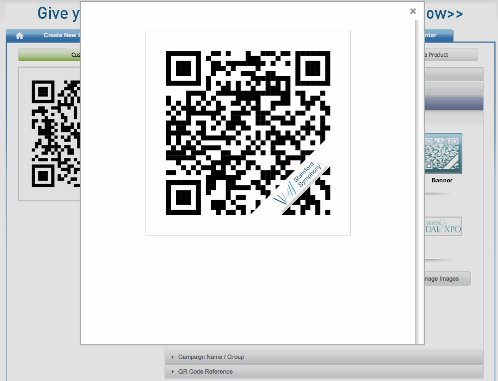
After choosing your image, the QR code preview on the left will update to show you how your image overlay will look. You can also click the magnifying glass icon for a larger preview. In this case, we have chosen the “Banner” option for image placement.
With the “Banner” placement option, you can use the checkbox provided to decide whether you want the overlay image to be constrained within the QR code image area.
Each of the placement options also allows you to decide whether you want the background of the image overlay to be transparent.
While you are still in design mode, try experimenting with each of these options to get the best look for your branded QR Code.
Once you have finished creating your branded QR code, it is ready to be used in mobile web pages and on any other promotional items you choose.